While that statement may seem just a little over the top my philosophy is, “if it ain’t broke, don’t fix it”!
My family and I love jerky!
This has been our go-to venison jerky recipe for 20 years.
I’m pretty sure that if I made it any other way I would have a rebellion on my hands the likes of which Darth Vader and the Empire have never seen.
And I love giving it away as Christmas gifts as well. At least the stuff I’ve hidden well enough that no one finds it.
If I don’t hide it, it just seems to disappear.
Totally into thin air.
No one will fess up.
Did I mention it’s really good jerky?
Every year at hunting season, we are blessed with venison. I usually have a whole one that is reserved just for jerky and sausage making.
The last several years, that has been about 70 pounds of venison sliced for jerky and ground for burger each year.
And that, my friends, is a LOT of deer jerky!
I make Peppery Deer Sticks and Summer Sausage out of the ground meat as well. And we enjoy the roasts and backstraps of the others all winter long.
A special favorite is the Crockpot Venison Goulash on busy nights.
Today, we’re going to focus on the jerky, though.
Venison jerky stores well, is easy to take on hikes or camping trips, and is packed with protein.
And It’s great for snacking on at any time.
It’s also incredibly easy to make.
Which y’all know makes me happy dance. 🙂

This recipe is a little vague.
It’s less a recipe per se, and more a tutorial.
But here we go.
Best Ever Venison Jerky
- 1 venison backstrap
- 1 15 oz bottle soy sauce (I use Kikkomen)
- I capful of liquid smoke (unless you’re going to put it in the smoker, which I like to do)
- Homemade Lemon Pepper
- Dehydrator (this dehydrator
 is the one I have and I love it!)
If your deer meat is not already sliced, slice it as thinly as you can. Meat slices easier if it is partially frozen.
After it’s sliced let the meat thaw completely.
While the meat is thawing, mix up the marinade.
My venison jerky marinade is so simple! Just mix soy sauce and the liquid smoke (if you’re using it) in a large bowl.
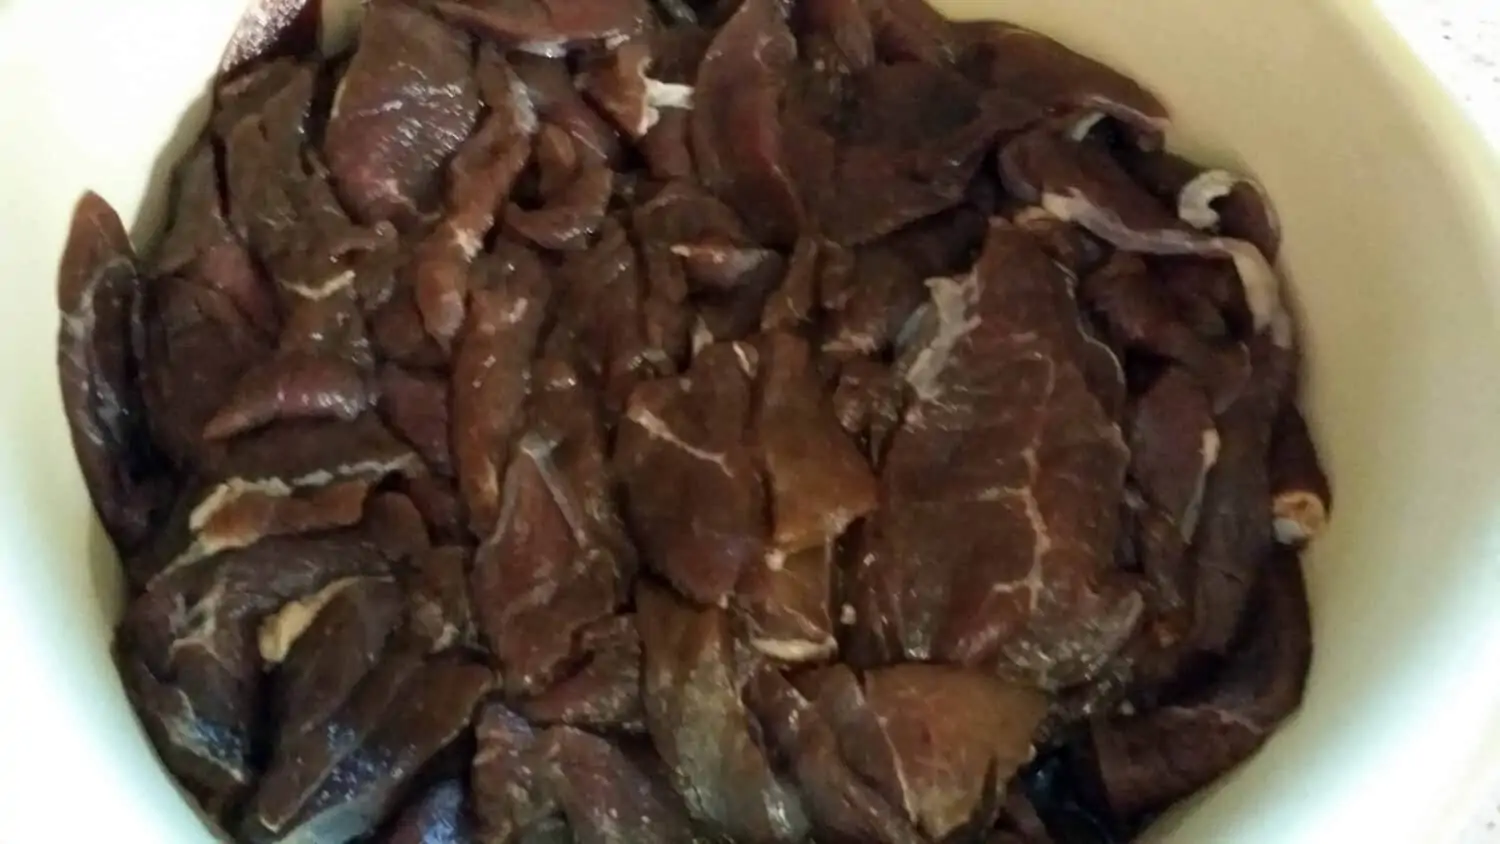
Place the thawed meat into the bowl in layers.
I like to turn the first layer of meat a few times to let the marinade get all through it. And then repeat that with the next layers.
If you’re not using the liquid smoke, you can put some meat in the bowl, pour some of the soy sauce over it, and then add more meat.
When all the meat has been added to the bowl, make sure the it’s all submerged as much as possible.
If you have too much meat for the marinade, mix up some more in the same ratio and pour it over the top.

the meat in the soy sauce mixture
Marinating Your Venison Jerky
Now cover the bowl and put it in the refrigerator. You need to let the meat marinate for at least 12 hours and up to 24 hours.
Every once in a while take it out and turn the meat so that it all gets marinated evenly.
After about 16 hours it will have absorbed all or most of the soy sauce mixture. And it will look darker like this.
after marinading for about 24 hours
At this point you have 2 options.
Option 1: Smoking
If you didn’t use the liquid smoke and you want to put it in the smoker here’s what I do.
I use parchment paper and make parcels.
Get a piece of parchment paper and put some of the meat in the middle a few layers deep.
Now, pull the longer ends up together and fold them over several times til you get down to the meat.
Then take the unfolded ends and fold them up on each side.
And then take a skewer or sharp fork and poke holes all over it. Top, sides, and bottom. That way it gets smoke in all over.
Then load them into the smoker. Just have it hot enough to make smoke.
I usually smoke it for about an hour and then bring it in and put it into the dehydrator.
Our favorite wood for smoking the venison jerky is hickory chips![]() , but apple chips
, but apple chips![]() is our second favorite.
is our second favorite.
Option 2: Dehydrating
The second option is to just put it directly into the dehydrator.
Lay it out on the trays so that it’s not overlapping other pieces. Then sprinkle a liberal amount of the lemon pepper all over it.
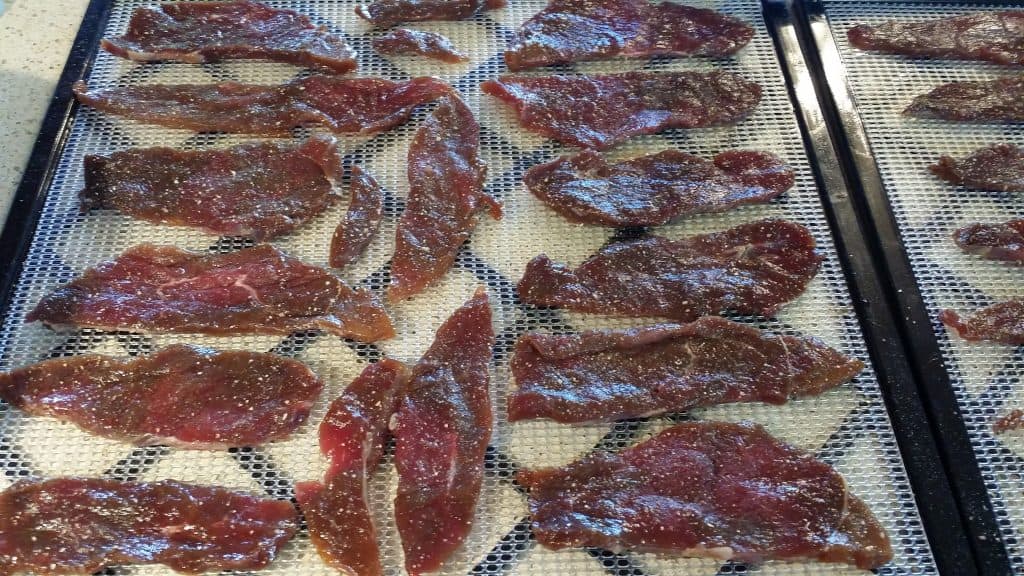
venison slices with lemon pepper
Put the trays into the dehydrator and turn it on. If yours has a thermostat set it at 155°F.
After a few hours I usually turn it over. Depending on the dehydrator you have, you may need to swap the trays around to maintain an even heat.
I also consolidate the meat into fewer trays as it dries because it shrinks. I sometimes end up with half the amount of trays that I start with.
Of course, the kids snacking on it before it’s completely dried probably has something to do with that.
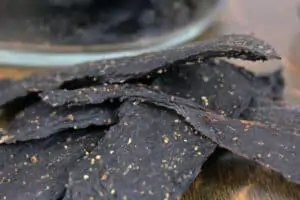
Your venison jerky is finished when it’s leathery but still pliable.
The drying time will depend on how thick the meat is, the humidity level, and the temperature of your dehydrator.
It could take as little as 4 hours, and up to 12 or more. After it’s dried, let it cool and then put it in an airtight container.
Option 3: Oven Dehydrating
If you don’t have a dehydrator, no worries!
Spread the jerky slices out on cooling racks over rimmed baking sheets.
The baking sheets catch the drips so they don’t end up in the bottom of your oven.
Set your oven to the lowest setting it has. Mine is 170°F.
Is should dry out faster in your oven because the temperature is usually higher than the dehydrator.
Check how dry it is after about an hour.
You will probably need to turn it over at the same time.
Check the dryness frequently. It’s done when it’s leathery but still pliable.

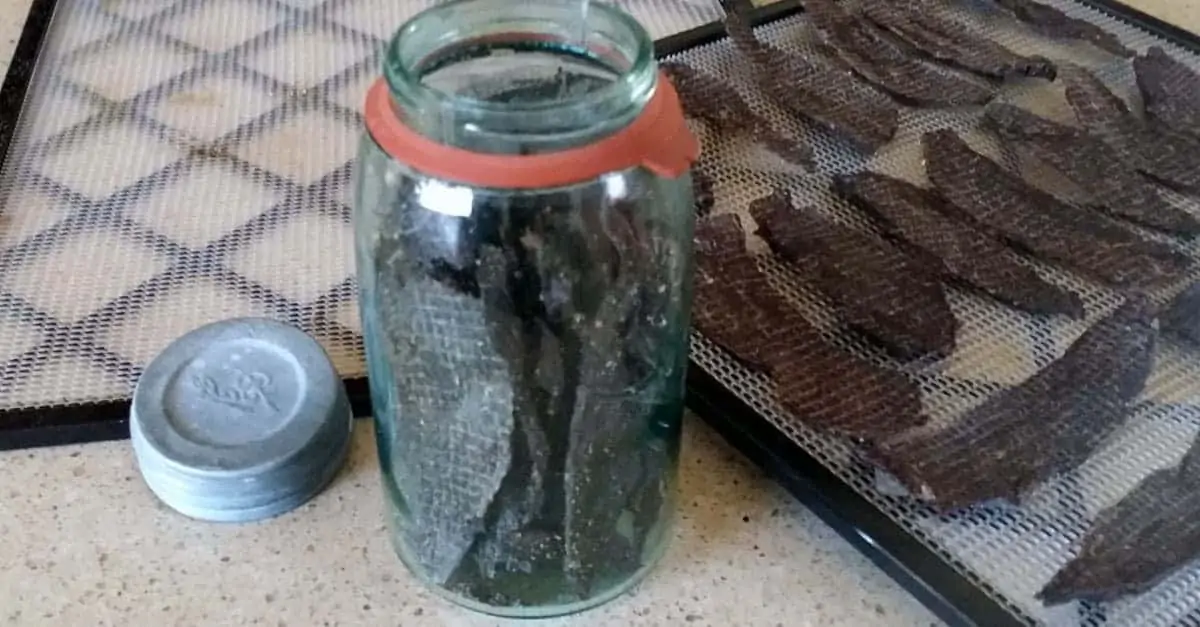
in the FoodSaver bag and ready to be hidden deep in the freezer…
Storing Venison Jerky
The jerky has enough salt in it from the soy sauce to keep well in an airtight container for a few weeks.
At least, if it makes it that long. 🙂
But for longer storage I seal it with my FoodSaver![]() and put it in the freezer.
and put it in the freezer.
And then hide it in the deep dark recesses so I can have some later when no one else is around.
But that’s our little secret…
Do you have a go-to jerky recipe? Share it with the rest of us. Pretty please. 🙂
Blessings!
More delicious kid approved snacks you should make:


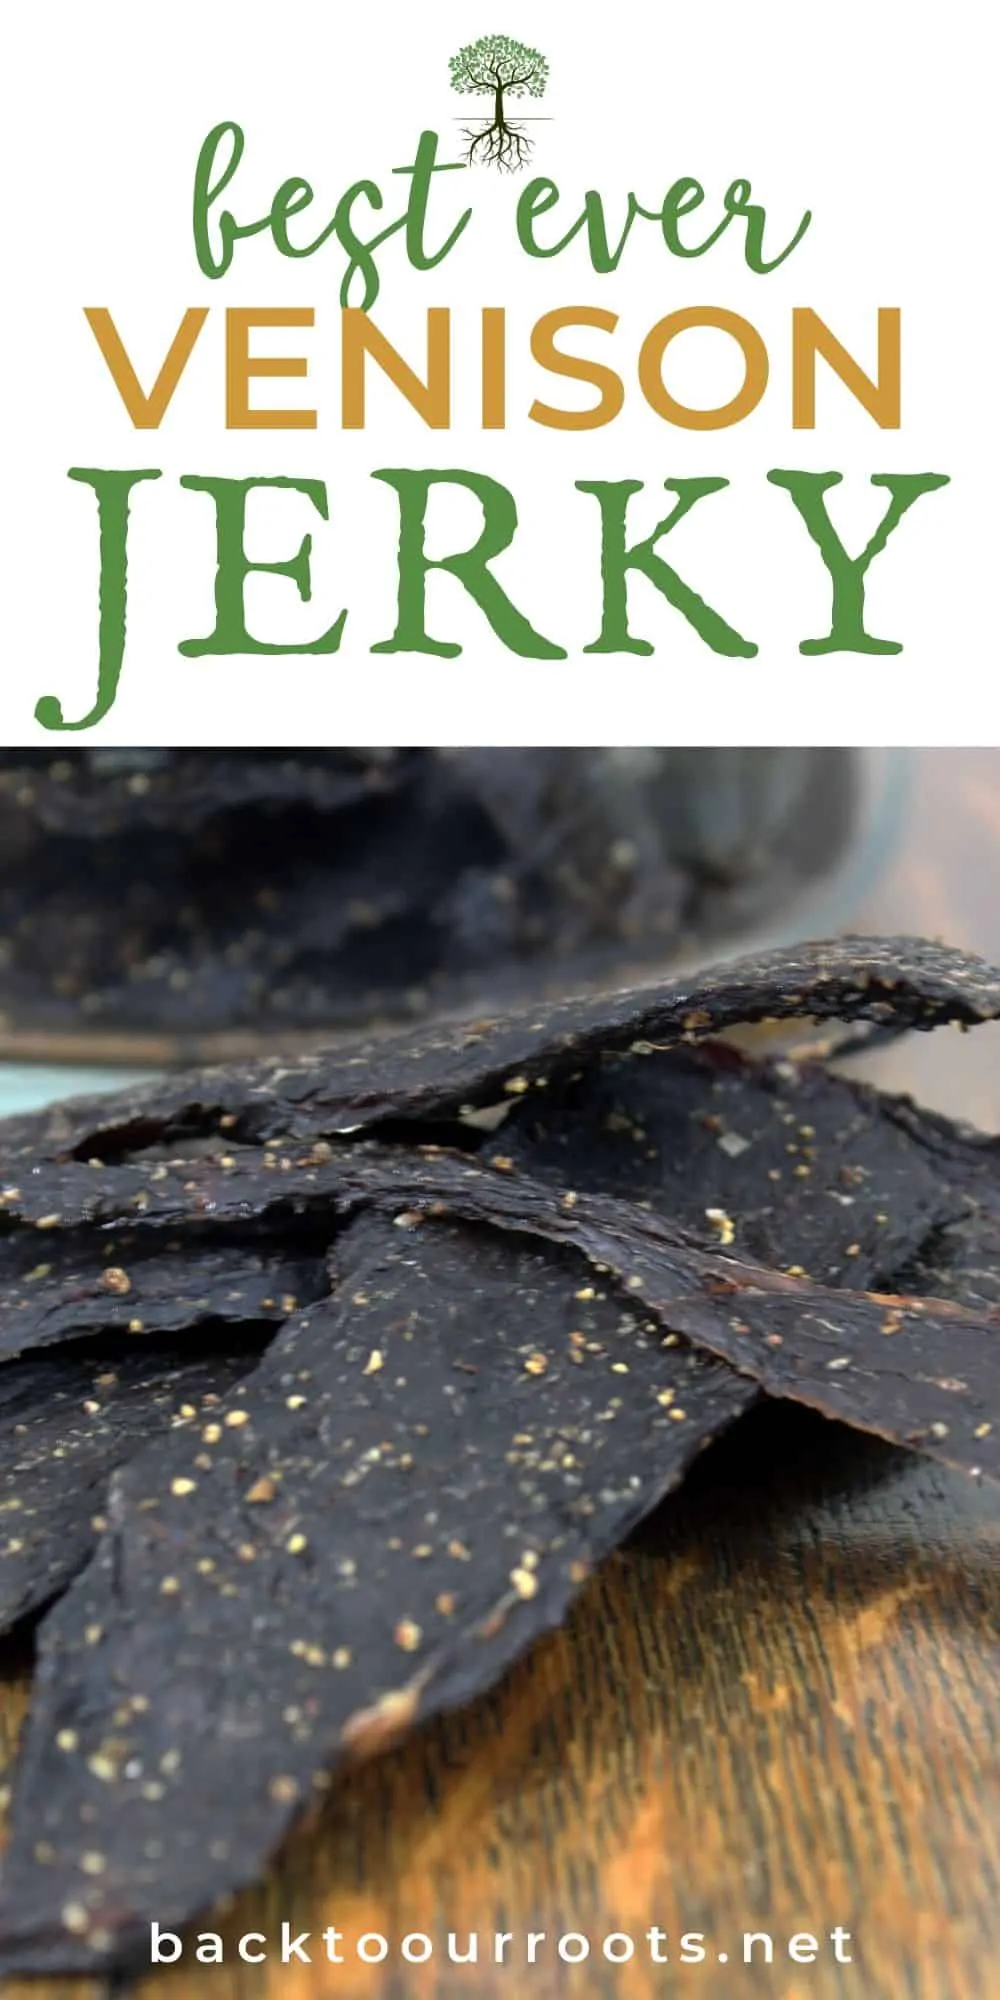
Venison Jerky Recipe
Ingredients
- 1 venison backstrap
- 1 15 oz bottle soy sauce I use Kikkomen
- 1 capful liquid smoke (unless you're going to put it in the smoker which I like to do)
- Homemade Lemon Pepper
Instructions
- If your meat is not already sliced, slice it as thinly as you can. Meat slices easier if it is partially frozen. Then let the meat thaw completely.
- Then mix the soy sauce and the liquid smoke (if you're using it) in a large bowl and add the meat. I like to turn the meat a few times to let the sauce get all through it. If you're not using the liquid smoke, you can put in some meat and pour some of the soy sauce over it and then add more meat.
- Now make sure the meat is submerged as much as possible. If you have too much meat for the sauce, mix up some more in the same ratio.
- Now cover the bowl and put it in the refrigerator. You need to let the meat marinade for at least 12 hours and up to 24 hours.
- Every once in a while take it out and turn the meat so that it all gets marinated evenly. After about 16 hours it will have absorbed all or most of the soy sauce mixture.
- Option 1: Smoking If you didn't use the liquid smoke and you want to put it in the smoker here's what I do. Get a piece of parchment paper and put some of the meat in the middle a few layers deep.
- Now, pull the longer ends up together and fold them over several times til you get down to the meat.
- Then take the unfolded ends and fold them up on each side.
- And then take a skewer or sharp fork and poke holes all over it. Top, sides, and bottom.
- Then load them into the smoker. Just have it hot enough to make smoke. I usually smoke it for about an hour and then bring it in and put it into the dehydrator.
- Option 2: Dehydrating The second option is to just put it directly into the dehydrator. Lay it out on the trays so that it's not overlapping other pieces.
- Then sprinkle a liberal amount of the lemon pepper all over it.
- Then put it into the dehydrator and turn it on. If yours has a thermostat set it at 155°F. After a few hours I usually turn it over.
- Depending on the dehydrator you have, you may need to swap the trays around to maintain an even heat. I also consolidate the meat into fewer trays as it dries because it shrinks.
- Your venison jerky is finished when it's leathery but still pliable. The drying time will depend on how thick the meat is, the humidity level, and the temperature of your dehydrator. It could take as little as 4 hours, and up to 12 or more.
- After it’s dried, let it cool and then put it in an airtight container.
Nichole says
Alton Brown’s Jerky is pretty good too! Can’t wait to try this recipe
Cery says
Hi Nicole! Give it a try and let me know what you think. 🙂 Thanks for stopping by!
Amy D says
When my family moved to Wyoming, instead of New England venison, elk would now be on the menu. Jerky is the boys go to snack but I now needed to change the recipe a bit. Half of the boys prefer a spicier flavor but the others like it a bit sweet and bland. I start with 4 lbs of elk that has been sliced thin and begin an overnight salt water soak to draw out the blood.
The next morning I get the ingredients ready for the magical 24 hr soak. I always use a curing mix (sodium nitrate) plus a variation of the spices below. **Sodium Nitrite is a salt that blocks the growth of botulism and prevents food spoilage. This also aids greatly in preventing the growth of listeria and adds a tasty flavor to the meat. As we are dealing with raw meat, it’s an important step.**
With the curing mix, I add 4 T Soy sauce, worcester sauce, and brown sugar, then 1 tsp garlic powder and onion powder. (Cery shows how to dehydrate minced garlic and onions which works great as well.) For those that like it bland, that’s all that is needed but for those that want more spice, I keep going … 2 T coriander, curry powder, mustard powder, black pepper, 1 T basil, thyme, cumin, sriracha, 3 T chili powder and paprika.
The easiest way to get even coverage on the pieces is to mix the dry spices in a mason jar and shake. Slowly pour the spices over the meat while you turn them with your other hand. Once the dry spices are in place, add the soy sauce and worcester. Still want MORE flavor??? Add one bottle of guinness stout beer. After the 24 hr soak, you are ready for the dehydrator.
Hint: The boys LOVE to add the jerky to ramen noodles!!
Cery says
Wow, Amy, that sounds really good. I’ll have to give that a try next year. Thanks for sharing that with us! Blessings!
Jonathan Wright, Esq. says
Amazing – thank you
Cery says
Thank you, sir! Blessings!
Jack says
I have been looking for a decent brine recipe for jerky and this sounds about right. Some of the best jerky I have ever eaten was made by an old man many decades ago who lived in a 1 room log cabin and heated by a wood stove. He would brine it then hang it on wire behind the stove for 2 or 3 days. Had to really tear at it with my teeth or use a knife to cut a piece. Loved the way it used to swell up as it was chewed. One thing no one is mentioning is the fact the worst cuts of meat make the best jerky (why waste good back strap or hind quarters} also cut it in stripes WITH the grain.
Cery says
Hi Jack!
Hope this brine works well for you. Sounds like that jerky he made was just about perfect!
I hadn’t really thought about the cut of meat before, but that sounds like it’s what people probably used to do with the stuff we grind up now.
I’ll keep that in mind for next season!
Cery
Davemade says
Cery, One of my favorites is using soy vay spicy n sweet chili heat
Cery says
Hi Davemade!
Oh wow! That sound really good. I may have to give that a try next time! Thanks for sharing that.
Blessings!
Cery