Here are parts 1, 2, 3, 4, 5, 6 & 7.
Feeding number 14/Building Up
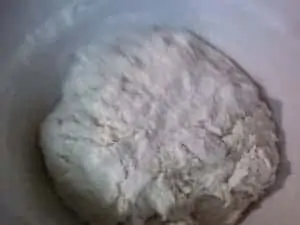
Well my friends, this morning was the last official feeding for Beowulf in the “starting the starter” category.
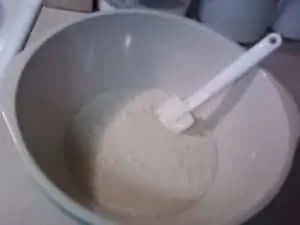
But don’t worry, I’ll keep feeding him. This is what he looked like this morning.
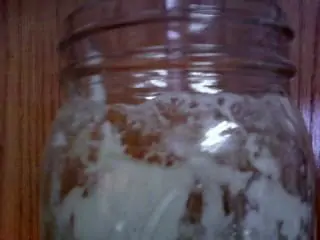
Before feeding number 14
Do you see that line around the top of the jar? That is how far up it rose last night!
Again, I’m a little excitable.
Remember that the temperature, the size of your jar, and the level of your starter after feeding will determine how high it gets.
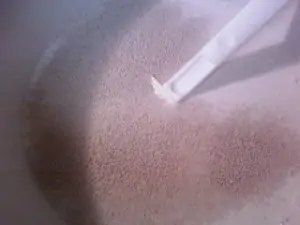
For this last feeding, I poured the starter into a bowl.
I did not discard 1/2 of it this time.
And I added twice as much as I have been.
This is the building up process that I talked about yesterday.
In order to have enough starter to make this Basic Sourdough Bread Recipe, you need 3 cups for the recipe and enough to save so you can keep it going.
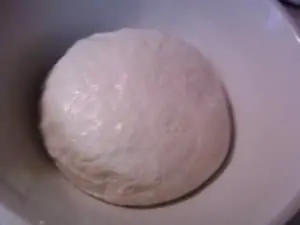
This is what Beowulf looks like now in this stage.
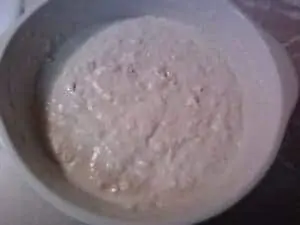
Building up Beowulf
He is now covered with plastic wrap and sitting on my kitchen counter.
You can use a bread cloth or a clean dish towel to cover your starter instead of plastic wrap. I do that a lot, actually.
But today I have all the doors and windows open and I don’t want anything getting in it that shouldn’t be in it.
Flours
While Beowulf is busy getting ready to be made into bread, let’s talk briefly about flour.
This may come as a shock to you, (it did to me), but all flour is not created equal.
Different types of grain make different types of flour which is better for different types of things.
For making bread, the higher the protein content, the better your bread will rise.
This is especially important when you are using a new starter.
In general, unbleached flour has more protein than bleached.
In general, bread flour will have more protein than most all-purpose flour. There are probably exceptions to these general rules.
A few more general things about flour.
If you freeze your flour, (which is a good idea if you buy in bulk), make sure the flour is at room temperature before using it.
When you open a new bag of flour, or if you just store it in the bag instead of a canister, use a knife or fork to stir and aerate it before you measure.
When you measure a cup of flour that has settled, it can equal as much as 1 1/4 cup of aerated flour.
Whole-wheat flour will absorb more liquid than white flour.
You cannot do a straight 1-to-1 substitution of whole-wheat flour for all the white flour in a recipe. You can usually get away with about a cup, depending on the volume of the recipe.
After that, you have to fiddle with it to get it the right consistency.
Most whole-wheat bread recipes have about 2 cups of white flour in them so that they rise better.
100% whole-wheat breads are very dense and chewy.
And, lastly, temperature and humidity affect the flour’s ability to absorb liquid. That is why in bread recipes you don’t have an exact measurement for flour.
Keep in mind also, that for sourdough recipes, how much flour you need will also depend on how thin your starter is.
The thinner the starter, the more sour the final product. I use a fairly thick starter for everything I make, since we don’t like the really tangy stuff.
One last thing. I mostly use my white flour starter for everything sourdough I make, so my recipes call for white flour.
You can still use the recipes with whole-wheat flour, you will just have to experiment with them to get them to come out the way you want them.
There are many recipes available on the internet for using whole-wheat sourdough starters. Some of which I actually adapted for my white flour starter. 🙂
Enough about flour, let’s bake!
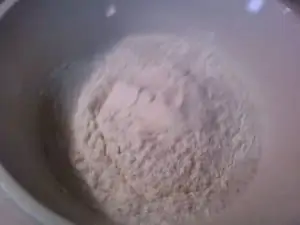
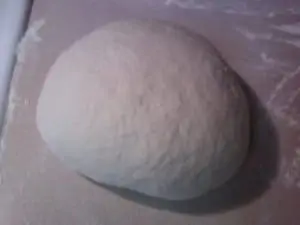
This is what Beowulf looked like after the building up process.
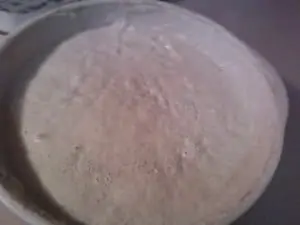
Built up starter
Basic Sourdough Bread Recipe
- 3 cups sourdough starter that is active and bubbly
- 1 1/2 cups water
- 1 Tbsp sea salt (if you use regular salt, only use 3/4 Tbsp)
- 4-8 cups organic, unbleached flour
- Melted butter for brushing on top of the loaves
- 1 Tbsp yeast (or 1 package – this is optional. I use it with new starters or on days when I am in a hurry.)
Stir down your sourdough starter and measure 3 cups into a large mixing bowl.
3 cups starter in bowl
You can see the thickness of the starter. Not runny, but not just a blob, either. Sorta in betweenish. Add the 1 1/2 cups water.

Add 1 1/2 cups water
Mix that up until it’s smooth. This is where I add the yeast if I’m using it. You can put it in the water to dissolve, or sprinkle it over and mix it in. I’ve done it both ways and they both work.
Add yeast, if using
Mix the yeast in well. Then add 3 cups of flour.
Add 3 cups of flour
Mix the flour in until blended.

Flour blended in
Sprinkle the salt on top of the mixture. Salt can kill yeast, so I like to protect the yeast with some flour first.

Sprinkle salt on mixture
Mix the salt in well. Continue to add flour a little at a time until it forms a ball.
Mixture forming a ball(ish)
This was at about 4 1/2 cups. If I were using my stand mixer, I would be able to get more flour incorporated. I can’t mix in as much by hand.
Now, turn your dough out onto a floured surface. Knead the dough, adding flour as necessary, until the dough is no longer sticky.
You can also do this step in the stand mixer with the dough hook.
After kneading
Today is in the low 70’s and humid. I ended up using almost 6 cups of flour today and kneaded for about 15 minutes.
Again, if I had mixed it in the stand mixer I would not have had to knead for as long as I did. But that’s ok, I like to knead. 🙂
Oil a bowl and place the dough in it. Turn the dough over so that the top is now oiled. I like to use the same bowl for rising that I use for mixing.
After I turn the dough out, I put my bowl in the sink and run hot water into it. That does two things. It makes it easier to rinse out the bowl, and since I use stoneware, the bowl is warm for the dough.
I also like to use butter to oil my bowl. You can use any kind of neutral tasting oil. I like butter because there’s nothing in it I can’t pronounce. I also just like butter. 🙂
Dough turned in bowl
Now cover the dough and let it double in volume. This time will depend on the temperature of your kitchen and whether or not you used any commercial yeast.
Without extra yeast it will take anywhere from 4 to 6 hours. With yeast it will be anywhere from 1 1/2 to 2 hours.
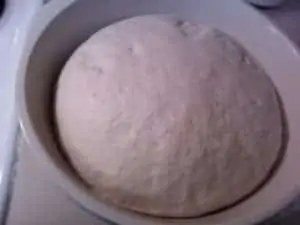
Dough is doubled in volume
Punch the dough down and divide into 3 pieces. Form into loaves.The loaves will be about 1 1/2 pounds, give or take.
Oil the baking pans, (again, I use butter) and place the loaves in the pans.
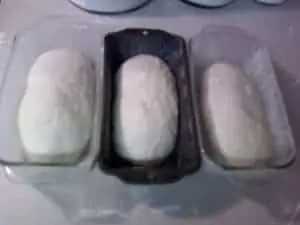
Loaves in pans
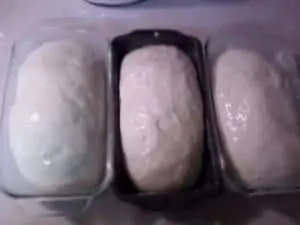
Cover again, and let rise till doubled. This rising should take only about half the time it took for the first rising.
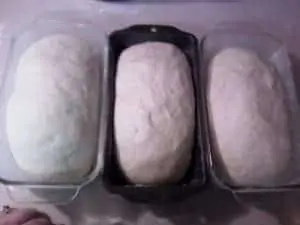
Loaves risen to double their original size
Preheat the oven to 350°F degrees.
When the loaves have doubled, brush the tops with melted butter. This will give the loaves a golden color and a crispy top crust.
Brush the tops with melted butter
Slash the tops with a lame (pronounced laam), or a sharp serrated knife. This helps the loaves to rise.
This is my lame. You can get your own bread lame here.![]()

Baker’s lame – has razor sharp edges on all sides
And then, because I usually have left over butter and because, you know, I like butter, I pour some of the butter into the slashes.
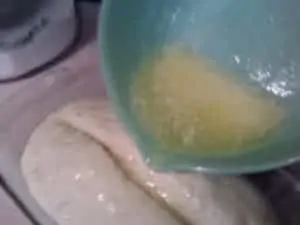
Pouring yummy butter into the slash in the loaf
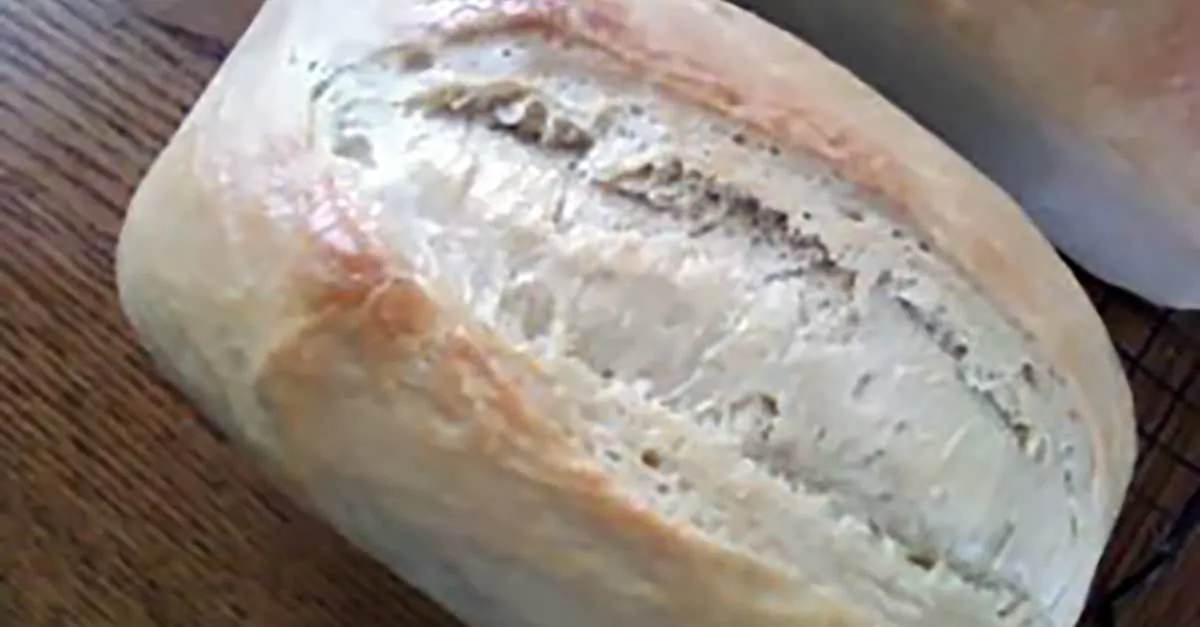
Put the loaves in the oven and bake for 30 – 45 minutes.
The tops will be golden and the bottoms will sound hollow when you thump them with your finger.
Turn out of the pans on to a cooling rack. If the bottom crusts don’t have as much color as you would like, put them back in the oven without the pans for a few minutes.
If you can resist, don’t slice the loaves until they are cool.
The loaves will continue to cook as they cool and the texture will be better if you don’t slice it until then.
But, if you can’t, you can’t!
Spread it with something like, maybe butter. And maybe even some homemade jelly. That’s what I do anyway.
And there you have it! The Basic Sourdough Bread Recipe of your dreams!
Blessings!
More sourdough recipes for you to make:


Sourdough Bread Recipe
Ingredients
- 3 cups sourdough starter that is active and bubbly
- 1 1/2 cups water
- 1 Tbsp sea salt if you use regular salt, only use 3/4 Tbsp
- 4-8 cups unbleached flour
- Melted butter for brushing on top of the loaves
- 1 Tbsp yeast or 1 package - this is optional. I use it with new starters or on days when I am in a hurry.
Instructions
- Stir down your sourdough starter and measure 3 cups into a large mixing bowl.
- Add the 1 1/2 cups water and mix that up until it's smooth. This is where I add the yeast if I'm using it. You can put it in the water to dissolve, or sprinkle it over and mix it in.
- Mix the yeast in well.
- Then add 3 cups of flour and mix the flour in until blended.
- . Salt can kill yeast, so I like to protect the yeast with some flour first.
- Sprinkle the salt on top of the mixture and mix that in well.
- Continue to add flour a little at a time until the dough forms a ball.
- Now, turn your dough out onto a floured surface. Knead the dough, adding flour as necessary, until the dough is no longer sticky. About 15 minutes.
- You can also do this step in the stand mixer with the dough hook. For about 8 minutes.
- Oil a bowl with butter or any other neutral tasting oil and place the dough in it. Turn the dough over so that the top is now oiled.
- Without extra yeast it will take anywhere from 4 to 6 hours. With yeast it will be anywhere from 1 1/2 to 2 hours.
- Punch the dough down and divide into 3 pieces. Form into loaves.The loaves will be about 1 1/2 pounds, give or take.
- Oil the baking pans, (again, I use butter) and place the loaves in the pans.
- Cover again, and let rise till doubled. This rising should take only about half the time it took for the first rising.
- Preheat the oven to 350°F degrees.
- When the loaves have doubled, brush the tops with melted butter. This will give the loaves a golden color and a crispy top crust.
- Slash the tops with a lame or a sharp serrated knife.
- Put the loaves in the oven and bake for 30 - 45 minutes.
- The tops will be golden and the bottoms will sound hollow when you thump them with your finger.
- Turn out of the pans on to a cooling rack. If the bottom crusts don't have as much color as you would like, put them back in the oven without the pans for a few minutes.
Judy says
Thank you for such an informative post about the starter. I’m still confused about one part. If I want to leave my starter on the counter after all the feedings, do I feed it every day? And if so, how much? And would I always need to discard or use part of it?
OH!!!! and do you stir before of after you measure for a recipe?
Thank you again!
Judy
Cery says
Hi Judy! Yes, if you want to leave it on the counter you need to feed it at least once a day. And feed it the same amounts of water and flour that you feed when you are getting it started. And yes, you need to discard or use part of it every time you feed it. If you want to put it in the fridge, you only have to feed it once a week or so. But again, you would need to use or discard part of it. You also need to let it come to room temp before feeding, and let it rise and get bubbly before you put it back in the fridge. There are several recipes here that are perfect to use the discarded starter in. 🙂
And you should stir the starter down before you measure it for a recipe. 🙂
Hope that helps. If you have other questions, don’t hesitate to ask!
Lea McKenna says
Cery, When I move the starter to the frig after the 14 feedings, is it covered with just the coffee filter, or do I break out a lid? Thank you so much for these posts. So far I’ve made waffles, cinnamon rolls, pretzels, and biscuits. Can’t wait to try bread! Lea
Cery says
Hey there Lea!
Go ahead and put a lid on it when you put it in the fridge. That will keep it from drying out.
I’m so glad you are enjoying all the baking!
Blessings!
Cery
Lea McKenna says
Thank you!
Barbars says
I am ready to make my bread, but I want to make one loaf at a time. Is there any part of your post “wich are all great” would I find the instructions for 1 loaf. Thanks so much
Cery says
Hi Barbara!
I don’t have it in the recipe, but you can cut it all by a 2/3 if you want only a loaf.
Or you can take the full recipe through to the shaping stage and tightly wrap the shaped dough in plastic wrap and put it in a freezer bag and pop it in the freezer.
When you want a fresh loaf you will need to thaw the dough in the bread pan and let it come to room temperature so it can rise. You could try thawing it overnight in the fridge and then putting it out in the morning to warm up and rise til it’s doubled in size.
Then bake following the directions listed.
Hope that helps!
Cery
Karen says
Hi!! Love your post has so much information……….just one question……..so many recipes say to bake after panning out……do you rise first? Or no?
Cery says
Hi Karen! I’m so glad you liked the post. Yes, you let the bread rise for a second time after putting it in the pans. Sorry if that was unclear! Blessings!
Nancy says
I am new to sourdough-ing and have down loaded, copied, followed a lot of starter info and this was the BEST! The forums use lots of Baker terminology and percentages and hydarations and weights that my head was so confused. I’m not as intimidated now! Thanks so much!
Cery says
Hi Nancy!
I’m so very glad that you found the directions easy to follow! Enjoy the sourdough journey!
Irene Walker says
Ok I have fed my starter for 8 days and nights, but i don’t think it’s rising they way it should. Is it ok to keep feeding it for a few more days?
And I just used all purpose flour. I’m going to use bread flour tonight to feed it and see if that helps move it along. And I want to have the tangy sour taste in my baked products, is there anything else I need to do?
Thank you
Cery says
Irene,
For the tangy taste you just need to let it rise longer. A slower rise in the fridge will develop the tang more than a quicker rise in a warmer environment. Or just leave out the commercial yeast so it rises slower without being in the fridge.
Irene says
My starter isn’t rising and falling, I’ve marked the jar. I started feeding it with bread flour after feeding it with all purpose flour for a week. I did the fourteen feelings , is my starter just slow ? Should I start over ?
Cery says
Hi Irene! There are a couple of things that could be the issue. #1 is that you may need to feed the starter a little more each time. It’s possible that it is not getting enough to eat. If that is the case, there would be quite a bit of hooch in the jar most of the time. The other possible cause could be the temperature of your kitchen. If it’s cold, it will take longer to rise. If it’s too cold it may not work at all. Same thing if it’s too hot. The ideal temperature is between about 72 and 78 degrees F.
Check those 2 things, and if that doesn’t fix it, let me know and we’ll dig in further!
Irene Walker says
I made your sourdough cinnamon rolls tonight. They are good but they didn’t taste to tangy to me. I had a cup of starter so I added three cups water and three cups of bread flour to it tonight. I want to bake bread tomorrow.
I just want to thank you for all the information and help. I think my kitchen was to cold in the beginning that’s why I was having trouble.
Since its warmed up some outside my starter has been going good.
Cery says
That’s wonderful Irene! I’m glad it’s working well now.
If you want the tangier taste, try letting them rise overnight in the fridge. A slower rise should give the flavor more time to develop. 🙂
Irene says
I made the bread recipe , it’s tangy and all but came out kind of dense. I will keep practicing til I get it right.
Just wanted to thank you for your help. I’m always in the kitchen making something.
Thanks
Cery says
You are so welcome Irene! I’m glad you’re having fun with it!
Tycie says
Hi, I just found this post and am really excited to start my starter. A friend gave some starter to my family when I was a teenager and I loved it but somehow ot went bad and I had no idea how to get another or that I could make my own until I came across this post, so thank you so much.
I do have a few questions though. First, how do I know if a recipe is good for the discarded starter during the first week or if has to be the completed starter? Also, with the bread recipe, its only me and my husband and we don’t eat very much bread, or really eat at home much, which is what im trying to change, but three loaves would be way too much for us and there are only so many people I can give it to. Would it be possible to cut the recipe in half or thirds to make just one loaf?
Cery says
Hi Tycie! I’m so glad you found us! For the first question, if the recipe calls for a starter that is “active and bubbly” that’s a mature starter. If it says “unfed starter” and isn’t being used to make anything rise then the discard can be used. So usually anything that has baking soda or powder as the leavening agent is okay to use the discard in. There are a lot of recipes to be found by googling “sourdough starter discard recipes”.
For the second question, you can definitely cut the recipe down. You will need to adjust the salt to less than half of what is called for. Or you can freeze the other loaves, which is what I do. I usually bake once a week and I rotate things. So one week I’ll make bread loaves and the next I’ll make English muffins, or bread bowls, or dinner rolls. Then just put them in the freezer until they’re needed.
Hope that helped! Blessings!
Brenda Gates says
This is the most amazing post I have ever read! I have been so intimidated by sour dough bread, but now I feel up to the challenge. Thank you so much. My 10 yr old grand daughter wants to learn about bread making this summer, maybe we can learn sour dough together?
Cery says
Hello Brenda! I’m so glad you found it less intimidating! Once you get started it’s a lot of fun. What a great way to spend time with your granddaughter! Let us know how it goes. Blessings!
Miranda says
I am so excited to find this recipe. Do I have to wait the full 14 days before using the “discarded ” portion if not when can I start using it?
Cery says
Hello Miranda! I’m glad you found us! You can begin using the discard right away. Blessings!
Mandy says
I was given a starter and I’ve not been extremely organized with it. I had it in the fridge for a while and fed it about once a week. I did not remove anything from it though. I then pulled it out of the fridge a couple days ago and started feeding it morning and night to try and make bread today. I began about 8 and it’s now in a bread pan to rise. It’s been there since about 4 and it’s barely risen. Would it be ok to leave it rise overnight? The started bubbles and had the hooch and all. And I’ve had it a couple weeks so it should have developed enough yeast right?
Cery says
Hello Mandy! Sometimes it takes a few days to get strong again. There are a lot of factors that could cause it to not rise. Over rising the first time will have an affect, as well as the temperature in your kitchen, and even the type of flour you are using. You can absolutely let it rise overnight if you want to.
If I have a batch that doesn’t ever rise, I usually fees the starter for another week or so and give it another try.
Blessings!
Amanda Rhodes says
Hi! I just started the sourdough starter, I’m using all purpose flour. Is that ok, or should I get a “better” flour?
Cery says
Hi Amanda! All purpose flour is perfectly fine. Using a bread flour will sometimes give you a better result when you bake with it, but I normally use the all purpose for everything. Blessings!
Gerald Turrise says
Hi Cery, I’m a 78 year old Greatpa and been cooking almost all my life. I’ve finally got the nerve to try making a sourdough starter .I’ve reached day 3 now and things are going well.Thanks for helping me get started ,I’m keeping my fingers crossed.
Cery says
Hello Gerald!
I’m glad you are giving it a go! You are so very welcome!
Blessings!
Tina Phillips says
Really enjoying the process and making all the delicious recipes along the way! I will be ready to make my bread in the next day or two but wonder if the recipe can be halved? There is just the two of us an though I could freeze, I prefer fresh made. Thanks and happy New Year!
Cery says
Hi Tina!
You can absolutely half the recipe. Use a little less than half of the salt. The recipe makes 3 regular home sized loaves, so half a recipe will make one large loaf (about the size you might get from a grocery store) or 2 smaller ones.
I’m so glad you’ve enjoyed the recipes!
Blessings!
Katie says
My bread busted on the side, what could have caused this?
Cery says
Hello Katie!
Appologies for the delay in answering.
Usually when bread tears on the side it’s because either it wasn’t kneaded long enough, or too much flour was added during the kneading process.
If it’s something that continues to happen, try kneading for another 3 to 5 minutes longer and see if that helps.
Flours are so different in different areas because of moisture content and the exact mixtures of wheat, that sometimes you have to experiment a little bit. 🙂
Cery
Ann says
Thank you so much for all of the info! You talked about if the starter is thinner, it would be less sour. How do you thin it and is that done right before you use it?
Cery says
Hello Ann!
Just add a little less flour for a thinner starter. It’s less sour because the yeast doesn’t have as much flour to feed on. So be careful that you don’t starve it by going too thin.
A shorter rise time also yields a less sour loaf. So adding a bit of regular yeast will speed up the rising process.
I hope I explained that ok, lol
Cery
Lisa D says
Your instructions make so much more sense than the dozen others I’ve looked at! Thank you for making the process easier to understand. The only question I have is: how long did you let the starter sit after you started the “building up” process? Did you make the bread the same day or did you wait until the next day?
Cery says
Hello Lisa!
I’m glad to hear you found the process easier to understand. I really like simple, lol!
Depending on how much I need to build up will depend on the time I wait. If it’s just a few loaves of bread I make them the same day. If it’s more than that, I might wait until the next morning. SO I would feed it once during the day without discarding, and then again before I went to bed without discarding.
Then in the morning I would have enough for maybe waffles or biscuits as well as bread.
Cery
Connie says
Might have missed it but how much starter is left over after this recipe and then what do you do with that?
Cery says
Hi Connie!
You should make sure to build it up enough that you have 1/4 to a 1/2 cup of starter left over. I normally have 1/2 cup because I use it almost every day for different things.
If you are going to use it 3 or more times a week, I suggest leaving it out on the counter. You’ll have to feed it twicw aa day like you do when you’re starting out.
If you aren’t going to use it that often you can leave it in the fridge. Take it out once a week and let it warm up to room temp. Stir it up, discard half, and feed like before. Then let it get bubbly before you put it back in the fridge.
Hope that helps!
Cery
Diana says
I made my starter with self rising flour. I’m on day 5 and my husband said I should have used all purpose flour! I did not see that in your instructions. Should I give up or can I start feeding the starter with the all purpose? Help!
Diana
Cery says
Hi Diana!
Just go ahead and switch to all purpose. It should be fine. No need to start over! 🙂
Cery
PRESLEIGH ANDERSON says
I absolutely love this. I have never made my own bread, or even thought of it. I want to thank you for the very informative posts. I do have a few questions. How can I tell if my starter is finishing quicker than say your time frame? I fed it for the 5th time this morning and it seems thick and almost wants to hold shape. I am adding the same amount and removing the 1/2 before I do. It had very little to no hooch this morning but bubbles were very present. It also smells sour. Is this how it should be in the “final” stage?
Cery says
Hey there Presleigh!
I’m glad your starter is going really well! It takes about 14 feedings for there to be enough yeast in the starter so that it’s strong enough to make the bread rise.
Sometimes it can be ready a few feedings earlier than that. But probably not after just 5 feedings.
It will be quite similar in the ready to use stage. If it doubles after a feeding, it’s ready to use.
Hope that helps!
Cery
Penny says
Thank you so much! I will be trying this – I read the whole thing – every word when usually I scan through to end of recipes – you sound so fun and give great instructions.
Cery says
Hey Penny!
Thanks for your kind words! Have fun!
Cery
Pat Dodson says
I loved your post, so informative. I felt I was almost there with you and you were showing me every step. I have got my starter going, I just wanted to say thanks for the great post. I hope mine will turn out good. I love giving baked goodies for gifts. Thank you so much!
Cery says
Hey Pat!
I’m so happy you felt that way! You are totally welcome, and I’m sure your goodies are going to be wonderful!
Cery
Jen L says
Hi Cery!
Thank you so much for all of this detailed information! My starter is on day 7 now and looks nice and bubbly. It rose quit a bit last night and I think I will definitely be ready in the next day or 2 to get baking! My question is can I make 3 small round loaves on baking sheets instead of loaves in pans?
Cery says
Hey Jen!
You can absolutely make round loaves or any other shape you fancy, like rolls or bread bowls.
Have fun!
Tara says
Amazing! I found this recipe on Pinterest and followed the steps. It felt like a little experiment on the kitchen worktop for a week. I had bubbles but a little hooch a times so I fed it more flour as directed. I did miss a fed one day too and on the last day I had to give it wholemeal bread flour which it seemed to enjoy. So, I didn’t add any extra factory yeast when it came to making the dough, but it took 6 hours in total after two proofs until it was ready for baking. I didn’t use butter either for the browning of the bread and used olive oil instead, which gave it a lovely light crush and helped it to continue to rise and butter I have read can stop the bread from raising. I also didn’t add a pan of water underneath. I made one very large loaf and its the best I’ve ever made! It was a little dense inside and I think this was because of the little mistakes but overall, it worked and tasted lovely. Plus I know what I need to do to improve for next time. I even saved a little yeast to start another one. The smell of the bread in the house was lovely. Thank you so much for posting this detailed recipe, its helped me so much. Next time I will add the extra yeast to see what happens, then after that, I intend on experimenting by adding some herbs. Once again, thank you!
Cery says
Hey Tara!
Yay! I’m go happy for you! Isn’t it fun to watch that experiment work?
I love the way you experimented with it.
Thanks for stopping by and letting me know how it went!
Cery
Charlene Haug says
How long did you let your starter sit after not discarding half then adding double the amount of flour/water to get your 3 cups of starter?
Cery says
Hi Charlene!
You need to let it sit until it’s active and bubbly and has just started to rise in the jar.
Cery
Katrina says
Good morning,
I would love to get my own starter made, but have questions.
-Can I use freshly ground Spelt flour? And are the feeding measurements the same?
-If I’m not actively making bread, can I just put my starter in the refrigerator indefinitely? Or do I have to feed it once a week to keep it alive?
Cery says
Hi Katrina!
Yes, you can spelt quite successfully. The measurements should work for spelt. Keep an eye on how thin it is and how much hooch there is when you go to feed it.
If it’s too thin or there is a lot of hooch, you’ll need to give it more flour so it doesn’t starve.
You can keep the starter in the fridge, but you really need to take it out every week or so to feed it. You can actually freeze the starter if you won’t be using it for a while.
Cery
Wendy l Barnes says
What a comprehensive article!!! Thank you so much for what you have put together. In such a way that makes it super easy to follow but the wealth of information is still there.
I have been reading blogs and posts for days on sourdough. All of them slightly different from each other. Some so technical it wasnt even worth the read. And some just hard to follow.
This right here was perfect.
I am on day 12 of a all purpose starter. Almost Doubled in volume every time I feed.
I will be making my first sourdough bread loaves this weekend. And they will be a success thanks to you!!!
Cery says
Hi Wendy!
Thanks so much! I’m so glad it was easy to follow. 🙂
Sounds like your starter is doing amazingly well! You’re going to love the bread.
Cery
Angela says
Hello! Months ago, a friend gave me some mature starter and the link to your site. I didn’t even know what starter was. Following your posts, I made my first loaf and have been having a lot of fun since then. I had success with feeding and storing in the fridge until my last loaf. My starter has become moody. It gets a lot of hooch, so I feed it just a little more flour, but then it gets goopy, it is like the beginning part of the process when making bread. So, I tried to thin it out with the 1/4 cup water and less than the 3/8 cup flour, but it doesn’t get bubbly or rise in the jar and it seems to separate. What would you recommend to bring it back to healthy? Thank you!
Cery says
Hi Angela!
What a great gift! I’m glad you’re having so much fun with your starter!
If there is a lot of hooch forming, that’s usually a sign that it’s not getting enough to eat. Feed it more than normal for several days. That should take care of the problem. It might get a little goopy to start, but it will get better.
Sometimes a change in temperature or humidity can make it moody, lol.
Hope that helps!
Cery