There’s nothing quite like the satisfaction you get from canning your own foods. Water bath canning is a simple process that allows you to stock your pantry with all kinds of fruits, relishes, jams, pickles, and salsas.
Canning helps you preserve your own harvest, take advantage of seasonal sales, and cut down on food waste. And you have a whole host of gift options for every occasion!”
This is part 2 in a series of home canning articles that are designed to take the overwhelm out of filling you canning pantry.
You can go here to read the first article, Home Canning Basics: How to Safely Can Food at Home.
And check out part 3 to learn all about pressure canning, Pressure Canning with Confidence: A Basic Guide.

Alrighty! Let’s get down to details of waterbath canning. A lot of the information here is the same as the information on pressure canning, but a lot of it is not.
Parts of a Waterbath Canner
3 pieces, pretty straight forward.

- Pot
- Lid
- Rack – the handles on the rack sit on the lip of the pot so that you can get jars in and out easily without getting too close to the boiling water.
And they come in different sizes…
- A small 12 quart mini canner that holds 7 pints or half pints.
- A medium 22 quart canner that holds 7 quarts, 9 pints, or 12 half pints.
- And a large 33 quart canner that holds 9 quarts, 9 pints, or 13 half pints.
A girl always likes to have choices.
Let’s just clear up the biggest question I get:
And the answer is, no you don’t! Any large pot will work as long as you can cover your jars with at least 1 inch of boiling water. But the process will be exactly the same.
Now that’s cleared up, let’s learn about waterbath canning!
How Waterbath Canning Works
Basically speaking, during processing in a water bath canner, the heat inactivates enzymes in the food, kills microorganisms, and creates an airtight vacuum seal.
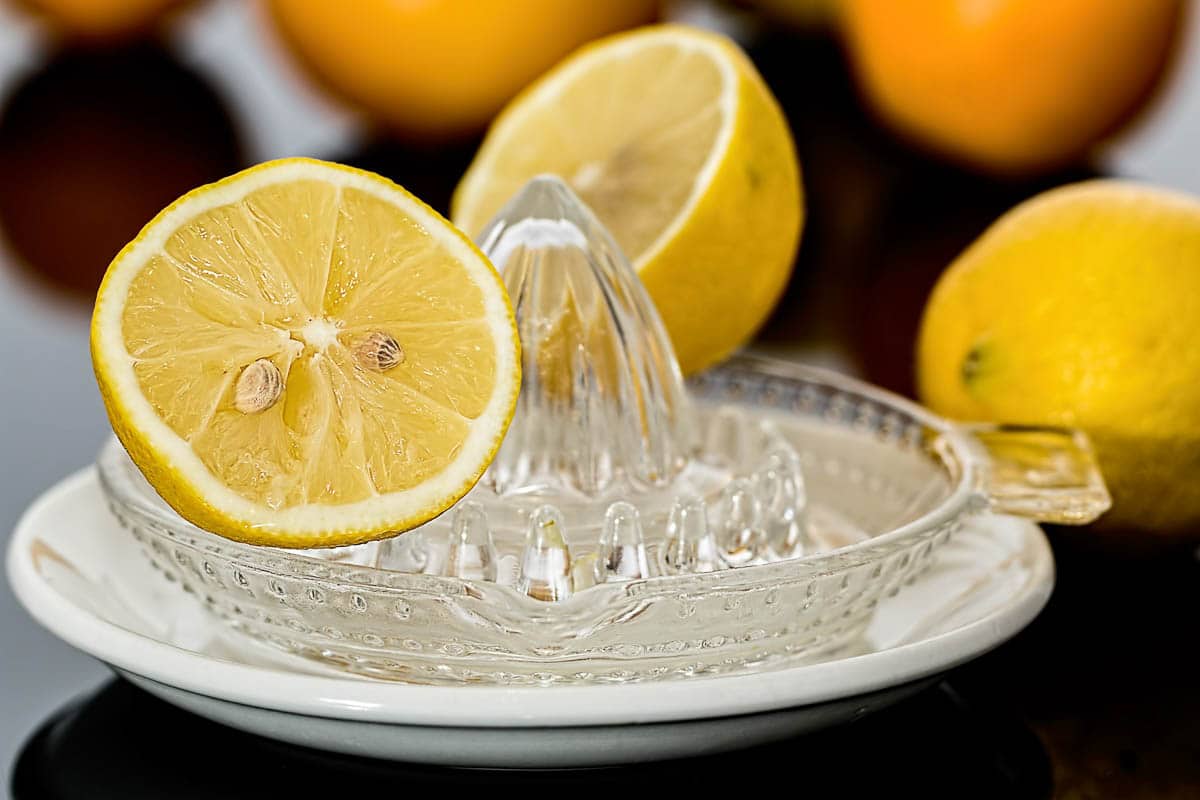
Waterbath canning can only be used for highly acidic foods with a pH level of 4.5 or lower. These foods include lemons, limes, cranberries, pickles, relishes, plums, apples, blackberries, strawberries, rhubarb, cherries, peaches, pears, raspberries, and some tomatoes.
Tomatoes are considered kinda iffy because there are so many different cultivars with different acidity levels. Many tomato recipes call for added lemon juice or vinegar to ensure the acid level is high enough to safely process in a waterbath.
Of course, then they tell you to add sugar so it tastes better.
Which sorta defeats the purpose for me so I usually opt to pressure can my tomatoes and tomato sauce.
Anything that you can process in a waterbath can also be processed in a pressure canner. But it doesn’t work the other way.
So any of those foods I listed earlier can also be processed in a pressure canner. In fact, if you don’t currently own a canner, I would suggest getting a pressure canner first.
As a bonus, a pressure canner can also be used as a water-bath canner!
They are more expensive, but they are way more versatile.
Acidity Matters
Why does acidity matter?
Acidity matters because botulism spores are very common. They are in the soil and on fruits and vegetables and other foods.
The spores don’t cause people any harm.
However, when the spores become active they produce the toxin that causes botulism poisoning. Spores become active in low acid, oxygen free environments. Like inside a sealed jar of low acid food.
The heat from a waterbath canner isn’t sufficient to destroy the spores, so the foods must be high acid to keep the spores inactive.
If there is ever a question in your mind about the acidity level of a recipe, err on the side of caution and process it in a pressure canner.
There are hundreds, if not thousands, of recipes available that have been tested and are perfectly safe in a waterbath.
The USDA’s National Center for Home Food Preservation will often tell you what you can change in a recipe and it still be safe for waterbath canning. So there is still a little room for experimentation to find something that’s just right.
One last note on acidity. If a recipe calls for lemon juice you have to use store-bought bottles lemon juice. It has a consistent acidity level that you don’t always get from squeezing fresh lemons. And for vinegar, the acidity level has to be at least 5%.

Heat
Now let’s talk about what happens when your jars are submerged in a water-bath canner full of boiling water. As the water boils it heats up the liquid in the jar and causes it to boil, too. Vegetables, fruits, and berries have within them enzymes that cause them to ripen.
These same enzymes cause the foods to continue ripening until they are no longer edible. The heat of the boiling liquid (212°F at sea level) inactivates these enzymes so the food in the jars doesn’t start to decay.
There are also molds, yeasts, and bacteria on the foods. And while that is completely normal, you don’t want to give them an environment where they can proliferate. The good news is that the heat from the boiling liquid destroys all these little beasties so they don’t grow inside your jars.
As the liquid boils inside the jars it also forces air out of the jar. The resulting vacuum is what creates the air tight seal between the lid and the rim of the jar. That seal keeps all the aforementioned beasties from getting back into the jar and doing bad things.
Altitude
Because water boils at different temperature depending on altitude, you have to process things longer at higher elevations. All canning recipes are written for sea level or below 1,000 feet above sea level.
If you do not live at that altitude you have to adjust your processing times according to the altitude chart below. Because having the right altitude is just as important as having the right attitude!

Cold Pack vs. Hot Pack
Most recipes will tell you if the item you are canning should be cold packed or hot packed, although sometimes you have a choice.
When you cold pack something, you pack the raw food into hot jars. You then pour boiling liquid like syrup or broth over the food leaving the required headspace.
Hot packed foods are heated first and then put into the jars. Boiling liquid is again added leaving the proper headspace. Hot packing is usually recommended if you have the option. Precooking allows the food to shrink so you can put more in the jar. But food is a little more fragile after cooking, so pack the jar carefully.
Be sure to follow the directions for how tightly to pack the foods as well. Some foods shrink, so these will be packed tightly. But some foods expand, like starchy vegetables, and need to be packed loosely.
Headspace
Headspace is the amount of room left between the top of the jar and the food. This amount will vary depending on what you are processing. The space allows the liquid to boil and the food to expand without loosing any of the liquid from inside the jar.
If there is not enough headspace left some of the liquid will boil out and all the food in the jars won’t be covered. That won’t cause anything to spoil in storage but it could turn dark on the top, which isn’t very appetizing.

Jar Sizes
The size of your jars will also determine the length of time to process. Quart jars will need more time than pints which are generally the two sizes listed in the recipes.
If you are using smaller jars like half pints or 4 ounce jars, use the processing time for pints. One and a half pint jars would need to be processed the same length of time as quarts.
Half gallon jars are no longer recommended for canning anything other than grape juice and apple juice.
Many recipes will give you options for what size jars to use. Think about not only how many people you will be feeding at a time, but also what the product is.
I’ll can chili in quart jars for the whole family, and also in pint jars for just 1 or 2 people.
Pizza sauce goes in 1/2 pints as does pickle relish. Look at some bottles and jars in the grocery store to give you an idea of what sizes to use.
Pretreatments
Pretreatments would be things like soaking for beans, dipping fruits in citric acid to preserve color, pricking the skins of fruits so they don’t split, or blanching.
Always follow the directions for pretreatments. You will end up with a better tasting and better looking product.
The Process
The basic process is as follows:
- Wash your canning jars in hot soapy water and keep them hot
- Fill the canner and start heating the water
- Prepare your lids as directed by the manufacturer
- Pretreat the food (if necessary) and prepare it for canning
- Fill the jars with canning funnel and wipe rims
- Attach flat jar lids and screw bands
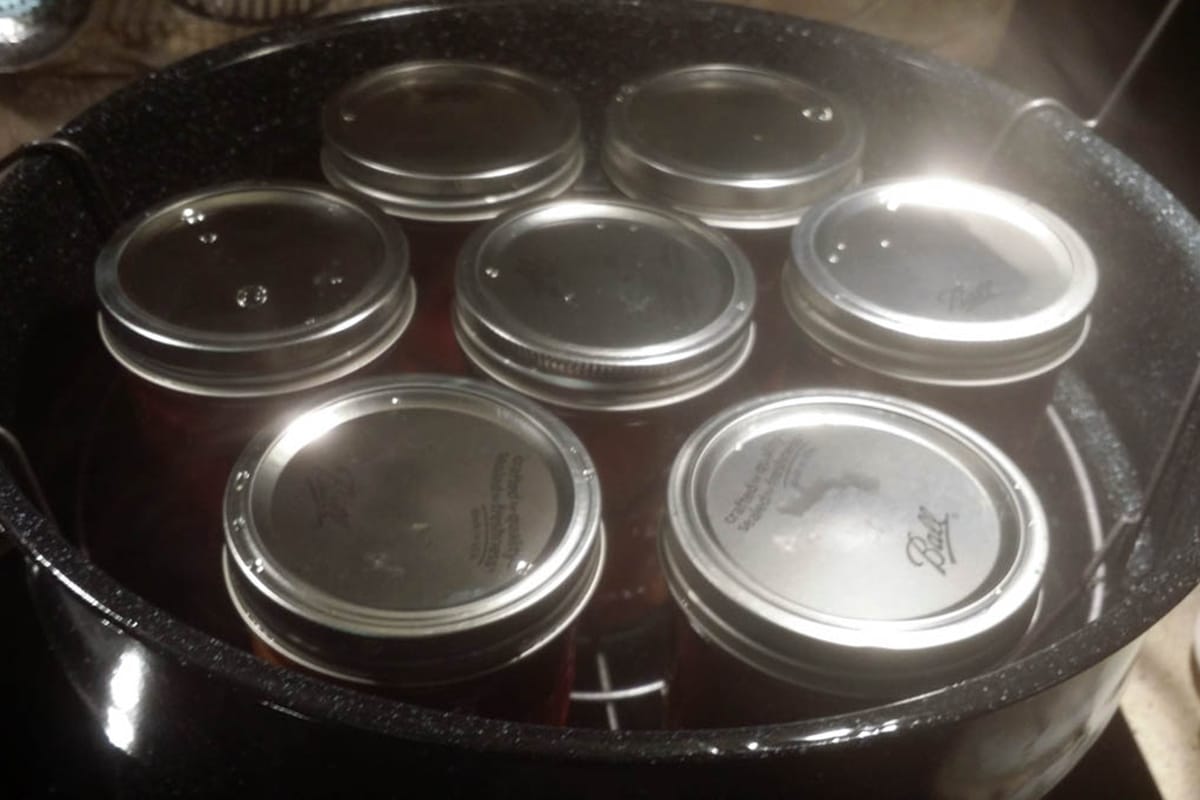
- Place filled jars in canner with jar lifter
- Cover jars with 1 to 2 inch of water
- Bring water to a rolling boil
- Process for time required
- Remove jars from canner
- After 12 hours check seals
Now that we know how stuff works, let’s move on to the doing! As an example of the process, this is how I would can my Spiced Plums in a waterbath canner.
When you are canning, the trick is to get your jars, your lids, your food, and your canner all ready at the same time. After you have done it once or twice it’ll go just like clockwork.
I wash and heat my jars in my dishwasher. I know that it takes about an hour and a half for it to get to the heated dry cycle. And I also know that the jars will stay hot for another 30-45 minutes. So that gives me lots of time to prepare whatever I’m canning.
Except for tomato saucy-type things. Those have to boil down so they take a while longer.
Pre-Process
First, I would put the number of jars the recipes says I need in the dishwasher and turn it on. I usually add 1 or 2 extra jars just in case I need them. In this case that would be 5 for the recipe, so I’ll wash 7.
Then I’ll measure all my syrup ingredients into the stockpot so it’s ready to go. Next, I’ll put the rings and new lids in a dutch oven so I know where they are when I need them.
I’ll fill the canner half way up with warm water and put it on the stove. On my stove it has to be on a small burner so I’ll go ahead and turn it on to medium.
If it starts to boil before I’m ready for it I’ll just turn it off.
About 15 minutes before the dishwasher hits the dry cycle I’ll wash the plums, cut them in half, and remove the pits and stems.
Then I’ll start heating the syrup. When it comes to a boil I’ll reduce the heat and simmer for 10 minutes.
I’ll fill the dutch oven that the lids and rings are in about 2/3 full of water and add a splash a white vinegar. The vinegar just helps to cut any residue from the water. Those go on the heat until it boils then I turn the water off.
Processing
Once the dishwasher hits the dry cycle I put the plums in the syrup. While the plums are heating I’ll get the jars out of the dishwasher.
I use a sturdy pizza pan to put the jars on. It makes it easier to carry the jars to where I need them and contains any mess I might make when I’m filling them.
When the syrup comes back to a boil, I take it off the heat.
I pack the plums into the jars leaving 1/2″ headspace. Then I ladle the boiling syrup into the jars to cover the plums leaving the correct headspace.
I make sure the air bubbles are out and top off with syrup if I need to. Wipe the rim of the jar with a clean cloth dipped in vinegar, and put the lid on.
Then I do a little thing I like to call the burner dance. I move the Dutch oven that the lids were in off of the stove and put the canner on the big burner and turn it on high.
Then I put the jars in the rack and lower them into the water. I use the hot water from the Dutch oven if I necessary to make sure that the jars are covered by 1 to 2 inches.
Put the lid on the canner and bring to a full boil. When it reaches a full boil, I remove the lid and set the timer for my processing time of 20 minutes.
I’ll turn the heat down some so that I just maintain the boil. If I lose the boil at any time after I begin my processing, I have to bring it back to a boil and begin my time again.
Post-Process
After my 20 minutes of processing time I’ll remove the jars from the canner. When you remove the jars they will still be boiling so be careful. And lift the jars straight up out of the canner.
The lids are not sealed yet and tilting will allow the liquid in the jars to escape and possibly compromise the seal. The jars need to be put on a few layers of towels out of any cold drafts to cool.
The jars will sit undisturbed for a minimum of 12 hours and maximum of 24 hours before I check the seals. If any of them don’t have a seal after that time I’ll put it in the fridge and eat it for dessert. Those that are sealed will be washed and labeled and put in the pantry.
And that’s all there is to it. It sounds like a lot but it’s really not.
That wraps up our little waterbath canning tutorial. Just remember, keep calm & process on!
Thank you for this well written article! This by far is the best one I have read regarding basic canning.
Hi Inga!
I’m so glad you found it helpful!
Cery